Foldr can automatically link an on-premise Active Directory user account with the corresponding user in Google G Suite / Google Workspace. For organsation controlled G Suite/Workspace domains, this is the recommended method of integrating Foldr with Google services.
The G Suite/Workspace integration allows the administrator to present a user’s personal Google Drive storage and also Shared Google Drives to users as soon as they sign in (removing the need for the user to link accounts manually). The automatic linking option works by using a Google service account and mapping a predefined Active Directory attribute to provide access to the correct cloud storage account. i.e. the Foldr appliance will match the user’s email address or UPN attribute to the user in the organisation’s Google G Suite domain.
Configuring Automated Linking with Google G Suite/Workspace:
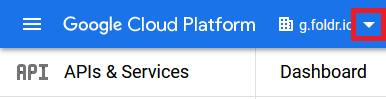
1. Browse to https://console.cloud.google.com/apis using your administrative account.
2. Create a new project – Click the chevron shown below. Depending on the view, it may be at the organisation level or another existing project
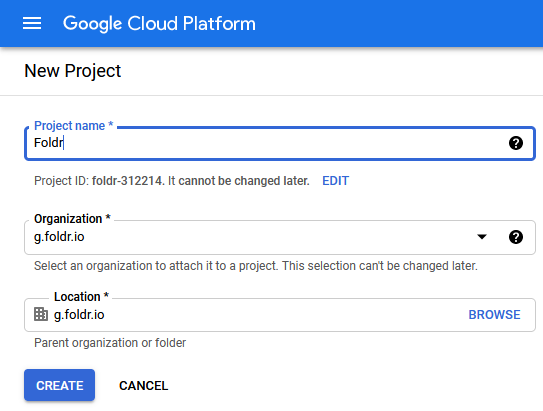
3. Click New Project

4. Give the Project a suitable name and click Create
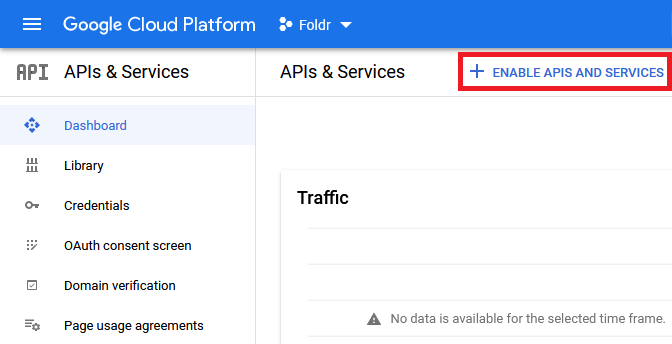
5. This will drop you to the APIs and Services panel. Click + ENABLE APIS AND SERVICES
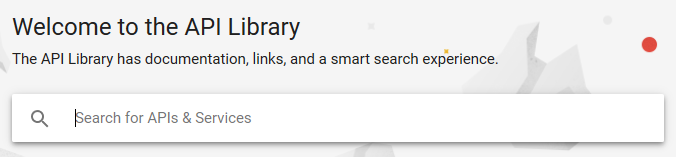
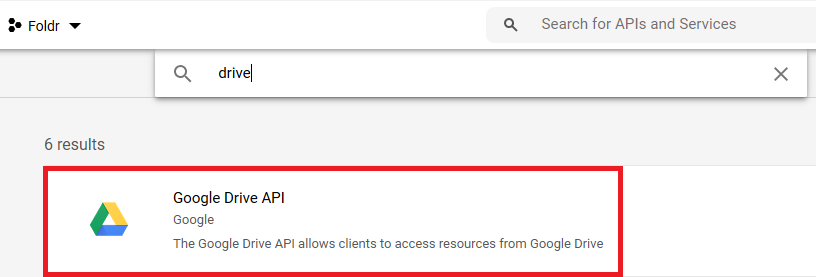
6. Search for ‘drive’ in the API library
7. Select the Google Drive API
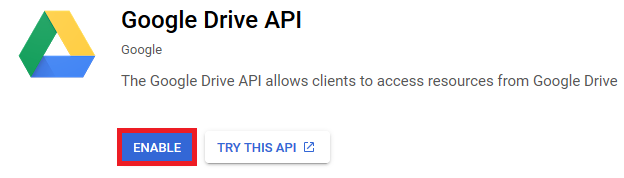
8. Click the Enable button
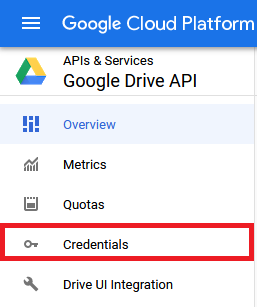
9. This will drop you at the Google Drive API panel. Click Credentials
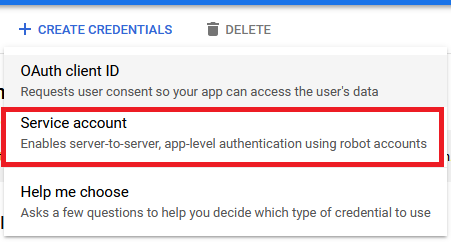
10. Click + Create Credentials

11. Click Service account
12. Give the service account a suitable name and click CREATE
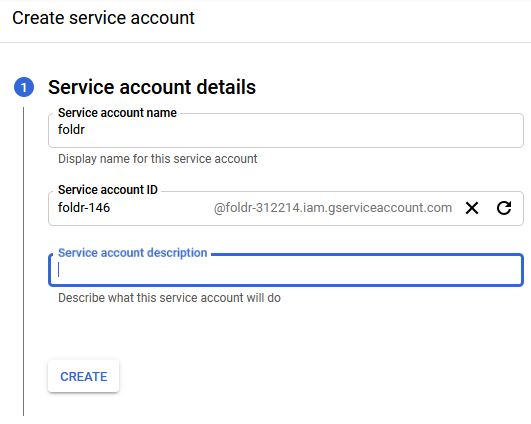
Note – The ‘service account ID’ is automatically populated
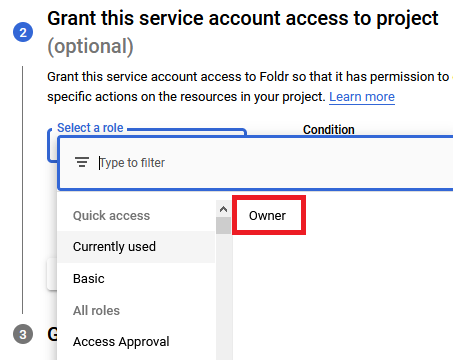
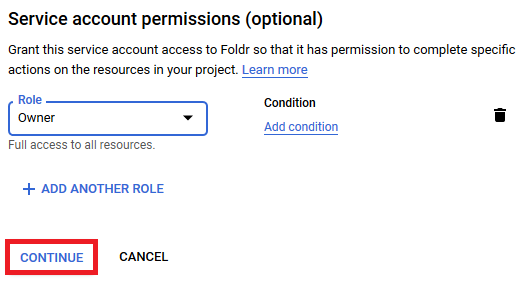
13. The service account permissions panel will display. Select the role as Project > Owner
14. Click Continue
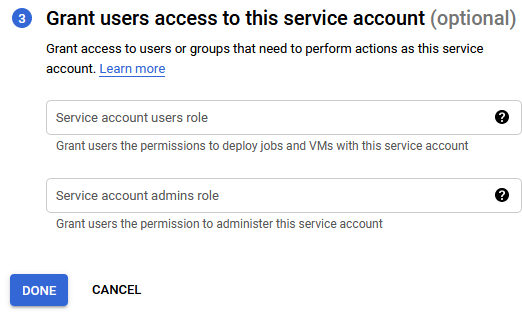
15. The grant users access to this service account dialog will display. Do not configure any options here and click Done
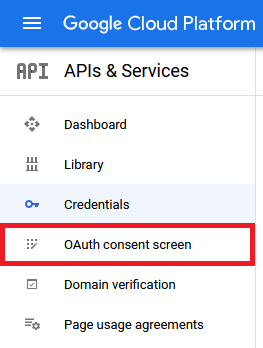
16. Next, configure the consent screen by clicking the OAuth consent screen option in the API & Services menu.
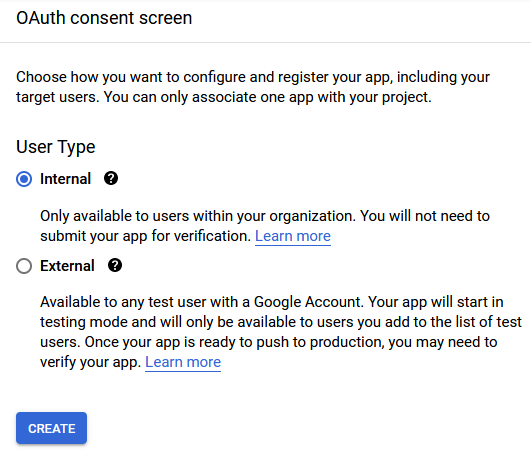
17. Select Internal as User Type and click Create
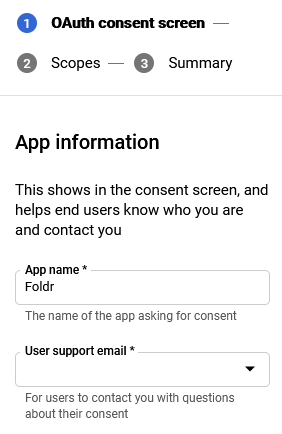
18. Enter a suitable App name and User support email address
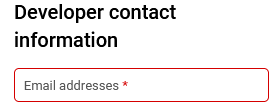
19. Scroll down and enter Developer contact information as an email address
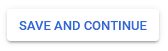
20. Click Save and Continue
21. The Scopes panel will display, do not configure any options here and again click Save and Continue
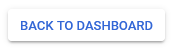
22. Scroll down on the Summary screen and click Back to Dashboard
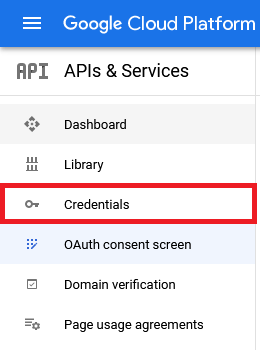
23. Click Credentials in the API & Services menu
24. Click the Edit button highlighted below on the service account created earlier.

25. The service account details panel with be shown. Scroll down and click the Show Advanced Details button. Then under the Domain-wide Delegation section, copy the CLIENT ID shown here and make a note of it as it will be used later.
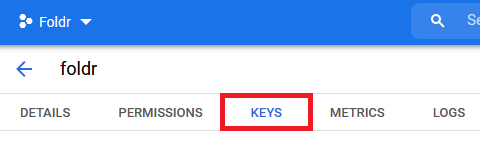
26. Click the Keys tab at the top of the screen
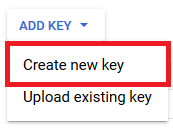
27. Click Create new key
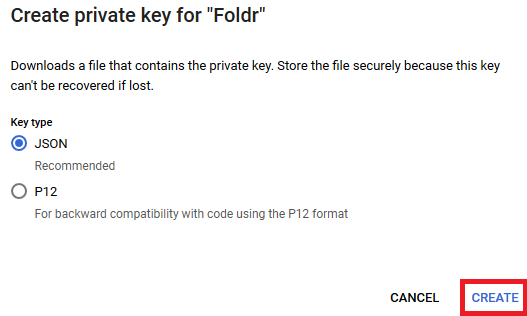
28. Leave the key type as ‘JSON‘ and click Create
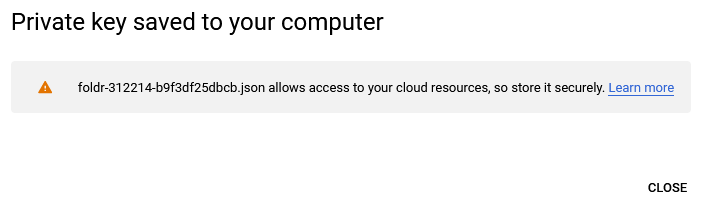
29. A notice will appear that the private key (.JSON file) has been created and this is saved to the local machine. Depending on your browser, you may get a Save As dialog appear asking where to save the .json private key. Keep this file in a secure place as it will be required later in the integration.
Click Close and the key will be shown in the summary
30. Click SAVE (directly under the key shown)
![]()
31. Click on the Details tab at the top of the screen and then select Show Advanced Settings (if shown) – under Domain-Wide Delegation click the VIEW GOOGLE WORKSPACE ADMIN CONSOLE button
![]()
32. The new browser tab will open at https://admin.google.com
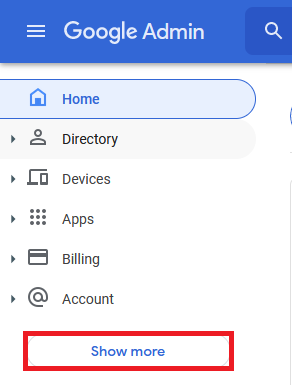
Click SHOW MORE
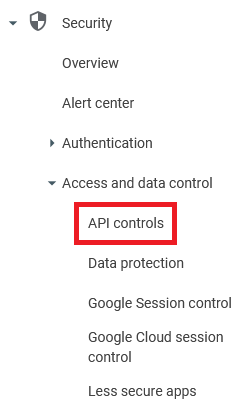
33. Expand Security > Access and data control and select API controls
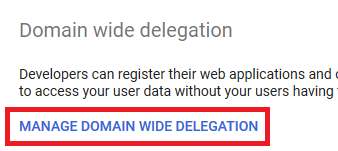
34. At the bottom of API Controls page select Manage domain-wide delegation
35. Click Add New

36. Paste the OAuth 2.0 Client ID as taken from step 25. In the OAuth scope field paste the following exactly as shown:
https://www.googleapis.com/auth/drive,profile
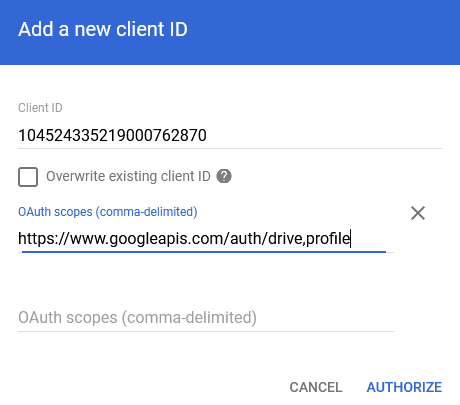
Click AUTHORIZE
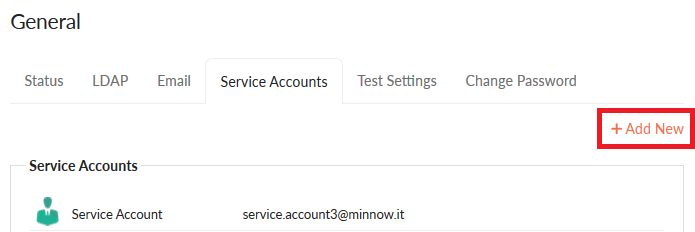
37. Browse to Foldr Settings and create a new Service Account with Type ‘Google‘ within General >> Service Accounts >> +Add New
38. Paste in the .JSON files (service account key) downloaded at step 23
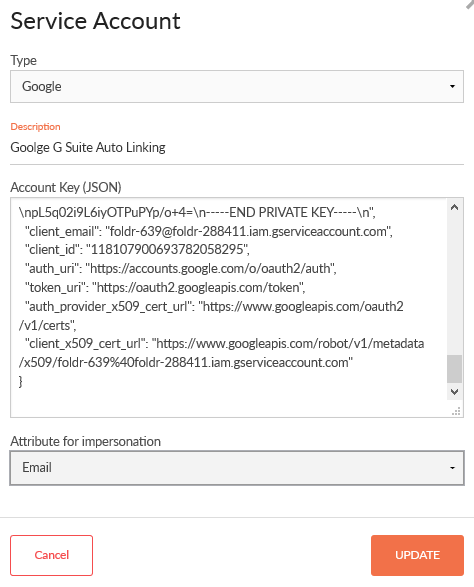
Note that the ‘Attribute for impersonation’ being used here is Email (i.e. the mail attribute in Active Directory) – you can alternatively select the UPN (userPrincipalName in Active Directory) or ‘Custom‘.
The Custom option is useful if neither the user’s G Suite email address is populated as the Email or UPN attributes in Active Directory and allows the administrator to enter an example of:
%username%@domain.com
39. Click UPDATE
40. Navigate to Foldr Settings >> Integrations and select Google G Suite
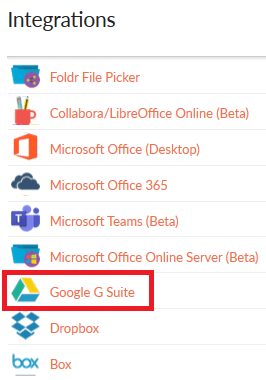
41. Enable the integration

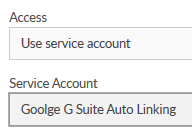
42. Under the Access section select ‘Use Service Account’ and select the service account created eariler
43. Next, create the storage object for Google Drive in Foldr Settings. Navigate to Foldr Settings >> Shares & Storage and create a new storage item by clicking +Add New
44. Give the storage location a suitable name and use the Storage Address of %googledrive%
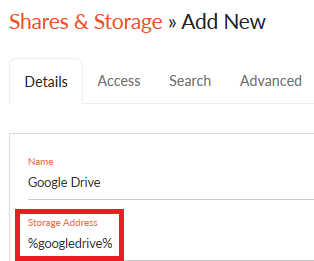
Select the Google Drive icon (or other as required). Click SAVE CHANGES
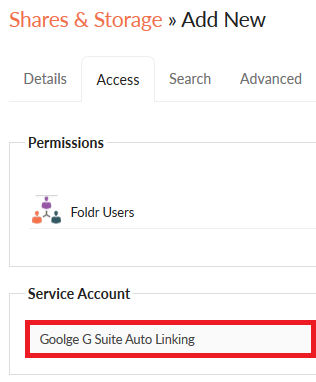
45. Click the Access tab and select the Google service account that was created earlier. Click SAVE CHANGES
The integration for automatic account linking with Google Drive is now complete.
When a user logs into Foldr using the web, mobile or desktop apps, they should see their personal Google Drive under My Files.
Microsoft Office documents that are hosted on-premise or in Drive may be edited in place using G-Suite productivity apps which will save back to their original location once the user has finished editing. As part of enabling the Google integration the user will now see a ‘Edit with Google G-Suite’ button in the Foldr web app for Office and G-Suite files.

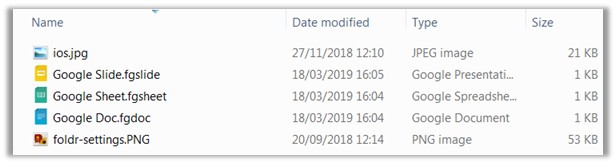
The Windows and macOS desktop apps will allow users to edit G Suite files (Docs, Slides and Sheets) straight from Explorer / Finder.
Searching Google Drive in Foldr
Providing Search capabilities through Foldr (web, desktop or mobile apps) for files in Google Drive can be enabled by following the steps 1-4 on the following article (see section titled Using the cloud provider’s search API (no indexing required) )