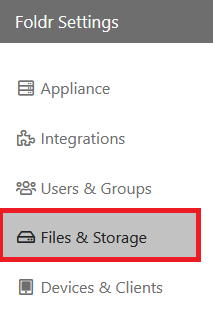
All SMB shares and cloud storage locations are configured within Foldr Settings > Files & Storage
Active Directory Home Folders (SMB)
Foldr can automatically discover and connect users to their Active Directory home folder, providing they are configured within Active Directory (homeDirectory attribute):
Active Directory Users & Computers >> User Object >> Properties >> Profile Tab >> Home Folder >> Connect.
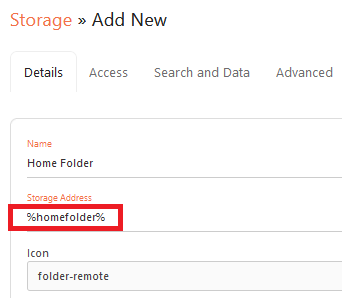
To perform automatic home folder provisioning, a new object should be configured within Foldr Settings > Files & Storage.
Configure a suitable Name and the Storage Address as using the built-in variable %homefolder% as shown below:
Once saved the Shares are available to view as a list in Shares & Storage:

If user’s home folders are configured using other methods (for example, login scripts or Group Policy Preferences) the administrator can add one or more additional shares as necessary to map share paths to user’s home folder locations as required. Please note that the standard environment variable %username% is supported so you can bulk provision home folders to suit the network environment.

Other SMB Shares
To present network shares other than the home folder, add another share within Files & Storage and configure the Storage Address / path as required.
Name: This is the name of the share that is presented to the end user.
Storage Address: Enter the fully qualified network path to the share, prefixed with smb:// – This should be configured as shown below:
smb://file server FQDN or IP address/share name
Example: smb://fileserver1.yourdomain.internal/Resources
Windows style UNC paths are accepted and are automatically converted into a compatible format by the appliance:
\\fileserver1.yourdomain.internal\Resources is automatically converted to
smb://fileserver1.yourdomain.internal/Resources
DFS Shares
DFS Shares are supported, however DFS shares must be configured fully qualified as shown:
smb://domain.internal/DFS_Namespace/Folder_Name
Not that DFS paths using a short, unqualified NETBIOS path are not compatible with Foldr.
Azure File Shares
On the Azure platform, an administrator can create SMB shares directly from the management portal without the need to deploy Windows file server VMs to provision SMB shares. These shares are supported and can be presented in the Foldr interface.
The Foldr appliance can either run on-premise, or in Azure to connect to Azure Storage, however the smb-mode on the appliance must be set to modern to ensure SMB3 is used. Run the following command on the appliance console:
smb-mode modern
Create the Azure File Share within the storage account as usual and click Connect from the ellipsis (…) menu

The Connect panel will display and the share’s username/password and storage address is shown as below:
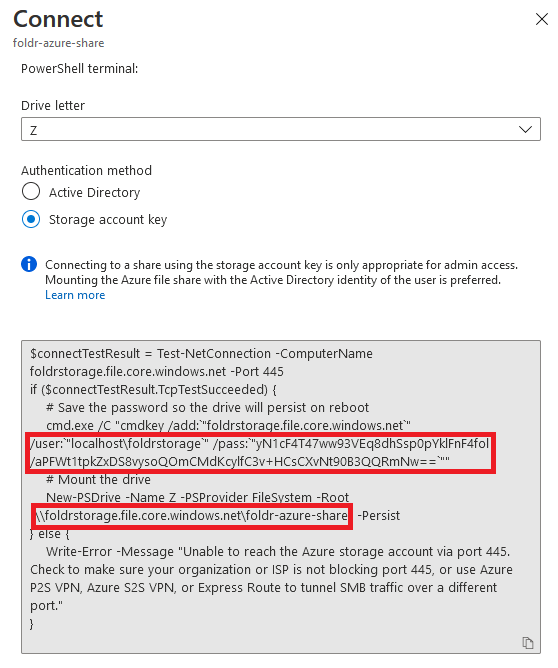
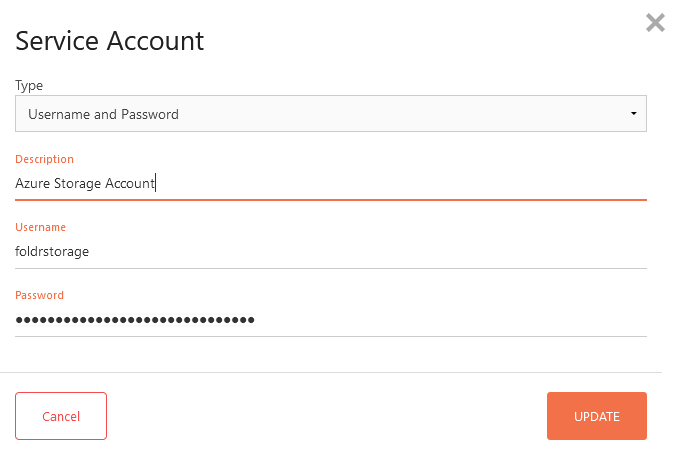
Username: foldrstorage
Password: yN1cF4T47ww93VEq8dhSsp0pYklFnF4fol/aPFWt1tpkZxDS8vysoQOmCMdKcylfC3v+HCsCXvNt90B3QQRmNw== (do not include the `” characters that surround the password)
Storage path: \\foldrstorage.file.core.windows.net\foldr-azure-share
Create a new service account in Foldr Settings > General > Service Accounts wtih the type ‘Username and Password‘ using the username and password above.
Create a new share in Foldr Settings > Shares & Storage for the Azure File Share.
Enter a suitable share name and use the storage address as taken from the Azure Connect dialog
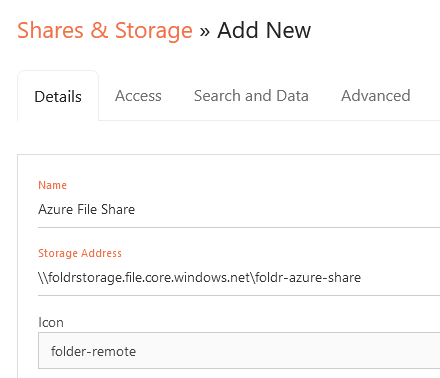
Click SAVE CHANGES. The storage address will automatically change to smb://foldrstorage.file.core.windows.net/foldr-azure-share.
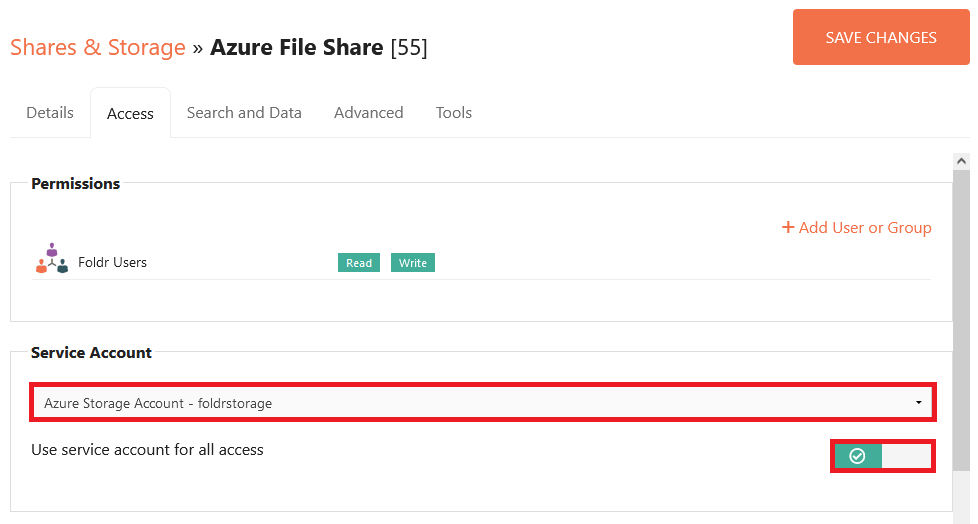
Click the Access tab, and select the Azure Storage Account as the service account and enable the toggle to ‘Use service account for all access‘
Controlling visibility of the Azure File Share
Notice that the built-in group ‘Foldr Users’ is configured by default under the Access tab > Permissions section. This represents all users in Foldr and with this configuration, all users would have access to the Azure File Share. To control visibility/access to the Azure File Share, delete the Foldr Users group object and search for suitable users/groups under Permissions > +Add User or Group, granting read/write permission as required.
Click SAVE CHANGES and the Azure File Share should now be accessible to users within Foldr.
S3 Storage
Foldr is able to present S3 compatible storage to users. This can be native AWS S3 buckets or a compatible S3 service such as that offered by Digital Ocean and many others.
The S3 integration is achieved through the use of a suitable service account containing the required access key and secret to access the S3 bucket.
First, create the required service account within Foldr Settings > Integrations > Service Accounts.
Click + Add New
Choose type as AWS S3 and populate the description, application key and secret with the required values for the S3 bucket, and optionally choose the Region if required.
Note in the example below, Digitial Ocean’s S3 compatible ‘Spaces’ is being configured and a region is not required.
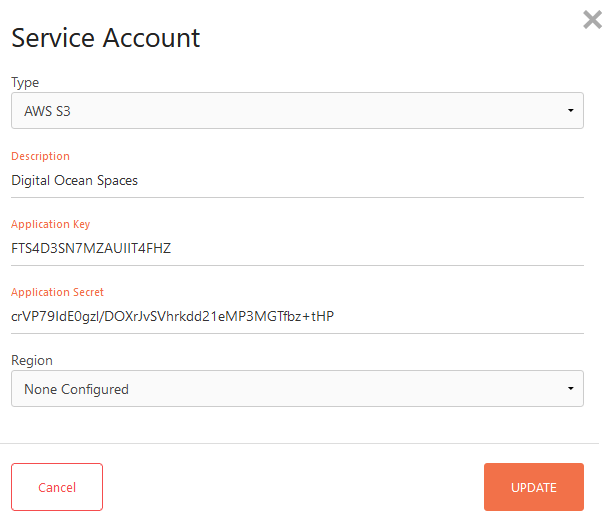
Click Update.
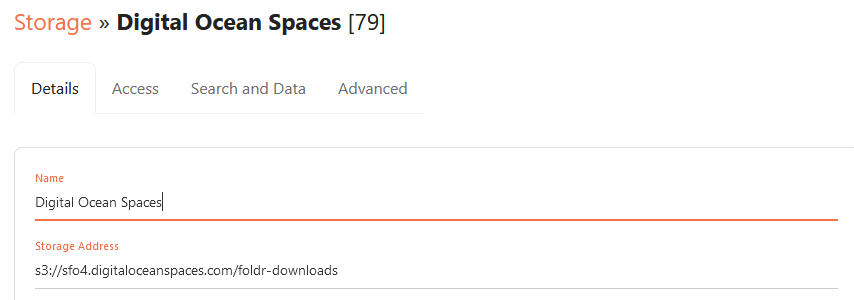
Now, under Files & Storage, create a new storage item by clicking + Add New – Give the storage item a suitable Name and the Storage Address should be conifgured using the path to the bucket using the S3:// prefix. Example below:
Click the Access tab and select the AWS service account required to access the S3 storage
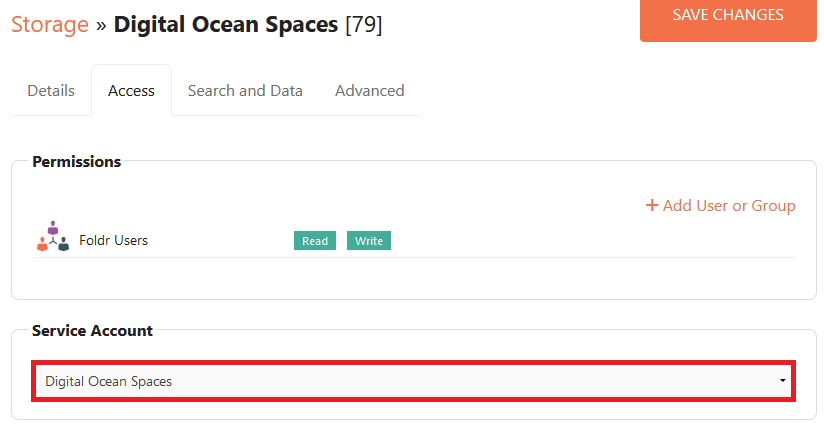
Permissions
By default the Foldr Users built-in group with by assigned Read and Write (allowed) permissions when adding a new share. This group represents all users that can sign into Foldr and as such all users will see the S3 storage location in their Foldr app when signed in. Should the admin need to restrict access to the S3 storage location through Foldr, either add suitable deny (read) permissions to the required users or groups, or alternatively, remove Foldr Users from the permissions and add users/groups with Read, Write (allow) to control access to the S3 location.
WebDAV Shares (Blackboard, Firefly and other LMS/VLE)
Legacy WebDAV shares are supported and should be prefixed with a Storage Address path of https:// as shown in the example below:
https://webdav-server.domain.fqdn/share-name
The share configuration screen provides an optional NTLM authentication toggle which is required with some LMS/VLE systems.